


Meet Innovations,
Rediscover Your Style!

One of the most striking details in home decoration in recent years has been wall molding applications, which offer a simple yet effective touch. These details, which are one of the first choices for those who want to add character to their interiors and create classic or modern lines, can even increase the value of a space when applied correctly.
In this article, I will provide step-by-step, easy-to-understand answers to frequently asked questions such as “How do you make wall moldings?”, “How do you apply cardboard moldings?” and “How do you cut and glue wall moldings?”
Wall Moulding: A Complete Step-by-Step Guide
In recent years, one of the most striking details in home décor has been wall moulding applications that offer a subtle yet effective touch. These decorative elements are a top choice for those wanting to add character to interiors and create either classic or modern lines. When applied correctly, they can even increase the value of a space.
In this guide, I’ll answer frequently asked questions such as “How to install wall moulding?”, “What is wall moulding?” and “How to cut and glue wall moulding?” in a clear, step-by-step format. We’ll cover everything from common mistakes to maintenance and painting, material selection to cost and time planning — all in one comprehensive resource.
What Is Wall Moulding and What Is It Used For?
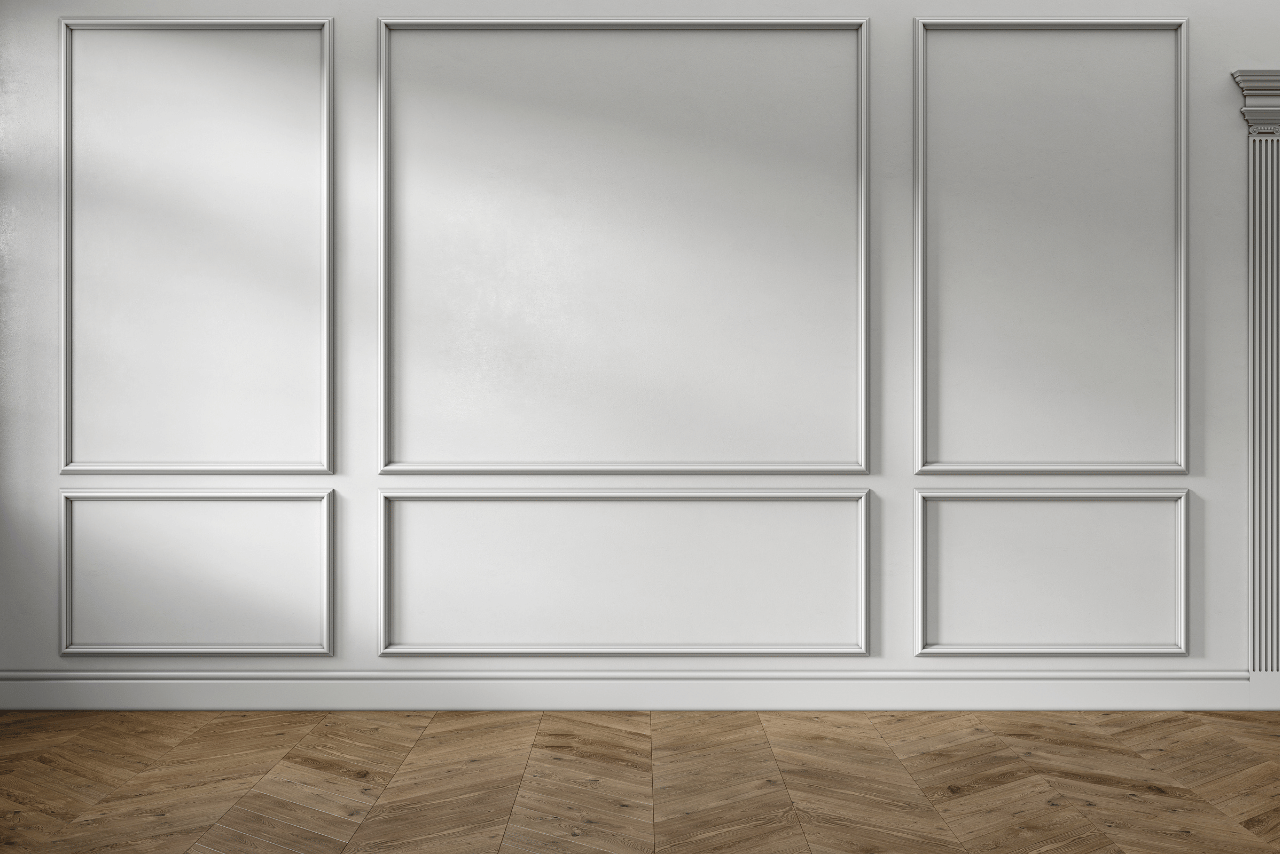
Wall moulding refers to thin profile elements, typically made of polyurethane, MDF, cardboard, or styrofoam, applied to walls for decorative purposes. Especially in living rooms, hallways, and bedrooms, they create a framing effect that adds depth to the wall surface.
Decorative moulding brings rhythm and proportion to a room; on plain painted walls, it creates a luxurious, stylish atmosphere through frame effects. Cornices, on the other hand, are often used at wall-ceiling junctions to add elegance and a classic touch.
Material Selection and Comparison
- MDF moulding: Feels solid and substantial; offers a smooth finish on flat surfaces. Be cautious of swelling in humid areas.
- Styrofoam (EPS/XPS) moulding: Very light and budget-friendly; however, more prone to dents. Appearance improves after painting.
- Plaster-based (gypsum) cornice moulding: Ideal for classic ceiling transitions and bulky profiles; requires precise cutting and smooth surface prep.
Tip: Consider paintability, moisture resistance, and ease of installation together. The overall style of the home (modern, classic, transitional) will guide material and profile selection.
How to Install Wall Moulding (Step-by-Step)
1. Plan the layout
Decide which wall(s) will have moulding, the number of frames, their sizes, and spacing. A simple sketch speeds up the process.
2. Take measurements and mark
Use a tape measure and pencil to mark symmetrical lines on the wall. Use a laser or bubble level for accuracy.
Tip: Leave at least 8–12 cm (3–5 in) from floor and ceiling for balance. Frame spacing of 6–10 cm (2.5–4 in) creates visual rhythm.
3. Select materials
Choose polyurethane, MDF, styrofoam, or plaster profiles based on where they’ll be used. Smooth, straight profiles suit modern styles; curved/ornate profiles suit classic interiors.
4. Cut the moulding
Use a mitre box and fine-tooth hand saw to make straight or 45° angle cuts. For corners, use 45° + 45° joints for both inside and outside corners. Lightly sand edges.
5. Apply adhesive
Apply MS polymer or polyurethane-based strong construction adhesive to the back in zigzag or dot patterns. Wipe away excess immediately to avoid paint blemishes.
6. Place and fix to the wall
Align with your marks and press evenly. Use masking tape for temporary holding if needed.
7. Check alignment
After each piece, recheck with a level. Even millimeter deviations can affect the final look.
8. Fill joints
Fill gaps with acrylic caulk or silicone. Once dry, sand lightly with 320–400 grit paper.
9. Prime and paint
If painting, apply water-based primer first, then water-based matte/semi-matte paint. Polyurethane and MDF give a smooth finish when painted.
Pro tip: Assemble all frames on the floor with masking tape for a “dry fit” preview before attaching to the wall to spot proportion errors early.
How to Cut Wall Moulding
Corner transitions are key to aesthetics — bad cuts ruin the composition.
- Mitre box + fine-tooth hand saw: Most controlled method. Standard corners are cut at 45°.
- Jigsaw/circular saw: Faster, but watch for straight-line tracking and splintering. Use fine blades.
- Sanding: Remove burrs after cutting — even tiny ones will show after painting.
- Test fit: Temporarily join two pieces with tape and check in place before gluing.
- Walls not exactly 90°? Measure the true angle with an adjustable mitre, then divide by two for each cut (e.g., 94° inside corner → 47°/47°).
Application Techniques
Regardless of material, the basics are: surface prep + accurate alignment + secure bonding.
- Surface prep: Ensure dry, dust-free, smooth surfaces. Fill and sand as needed.
- Adhesive: Use suitable MS polymer/polyurethane glue. Avoid over-application.
- Alignment: Follow marked lines and maintain the same height throughout.
- Joint finishing: Caulk → sand → prime → paint for a seamless look.
- Paintability: Polyurethane and MDF take water-based paint well; primer helps with plaster cornices.
Essential Tools & Materials
Tape measure, pencil, laser/bubble level, mitre box, fine-tooth saw/jigsaw, masking tape, construction adhesive (MS polymer/PUR), acrylic caulk, sandpaper (180–400), primer, water-based paint, cloths/drop cloth.
Décor Ideas Using Wall Moulding
- Headboard framing: 90×140 cm or 100×160 cm frames create a hotel-room effect; align with headboard width and lamps.
- Hallway rhythm: Symmetrical, narrow rectangles add flow; place mirrors or art inside for balance.
- TV backdrop geometry: Use wider profiles for square/rectangular modules or grid patterns; tie in with a bench/TV unit.
- Wainscoting (lower wall panel): From floor up to 90–110 cm with moulding + plain paint above; use darker tones below for a refined look.
- Shaker/picture frame style: Slim profiles for minimal frames; timeless for modern interiors.
Color tip: Painting wall and moulding the same color gives subtle shadow play; contrasting colors create a bolder, graphic look.
Adhesive, Primer & Paint Quick Guide
- Adhesive: MS polymer/PUR types offer strong bonding; fast initial grab and low odor are plus points.
- Primer: Balances absorbency, hides caulk marks, and reduces paint consumption.
- Paint: Water-based matte/semi-matte minimizes brush marks; choose durable interior paints.
Common Mistakes & Fixes
- Crooked lines: Check level after every piece.
- Excess adhesive: Wipe immediately with a damp cloth to prevent bumps after painting.
- Corner gaps: Measure actual wall angles and cut accordingly.
- Caulk marks: Thin application + full drying + sanding before priming.
- Poor proportions: Plan frame number and spacing based on wall width; 6–10 cm spacing works in most rooms.
Maintenance, Cleaning & Repainting
- Routine cleaning: Microfiber cloth or soft-bristle vacuum attachment.
- Minor repairs: Fill chips with fine putty → sand → touch-up paint.
- Color refresh: Primer + 1–2 coats of water-based paint.
- Moisture areas: Choose polyurethane over MDF; consider protective varnish in kitchens/bathrooms.
Cost & Time Planning (General Guide)
Cost items: Profiles (by meter), adhesive, caulk, primer/paint, masking/protective materials, cutting consumables.
Time estimates:
- Planning/measurement/marking: 1–2 hrs
- Cutting & installation: 2–6 hrs
- Caulk/drying/sanding: 2–4 hrs
- Priming & painting: 2–4 hrs (observe drying times)
Note: Time and cost vary depending on wall size, number of modules, profile type, and installer experience.
How to Install Plaster Cornice Moulding (Special Notes)
Plaster-based profiles give classic, substantial ceiling-wall transitions:
- Use a mitre box + fine-tooth saw for cutting, handle gently.
- Fill joints with plaster-based putty; sand after drying.
- This hides seams and ensures a smooth, unified surface after painting.
Frequently Asked Questions (FAQ)
Can wall mouldings be painted?
Yes. Polyurethane, MDF, plaster, and styrofoam mouldings can easily be painted with water-based paints after applying a suitable primer.
Will removing the mouldings damage the wall?
Strong adhesives increase grip, so minor surface damage may occur during removal. However, these areas can be repaired with filler and paint.
What if my wall is not flat?
It is recommended to level the surface beforehand. For slightly uneven walls, you can apply filler behind the moulding to balance it. For heavily uneven surfaces, correcting the wall first is the best option.
Which material should be used in humid areas?
Polyurethane or PVC-based mouldings are much more durable in humid environments. Wooden or MDF mouldings may swell and deform in such conditions.
What is the ideal spacing between mouldings?
Generally, 6–10 cm spacing creates a balanced and aesthetic look. However, this may vary depending on the design concept and personal preference.
Which adhesive should be used for installing mouldings?
Polyurethane-based strong adhesives or special moulding adhesives provide the best results. Depending on the wall, silicone-based products may also be used.
How long does wall moulding installation take?
It depends on the room size and number of mouldings. For an average living room, the installation can usually be completed within a few hours.
Do mouldings fall off over time?
With proper adhesive and correct application, mouldings remain secure for many years. However, humidity and uneven surfaces can negatively affect adhesion.
How should mouldings be cleaned?
Wiping with a damp cloth is sufficient. Avoid using strong chemical cleaners.
Can mouldings be painted in different colors?
Yes. They can be painted in any desired color, and even in different shades for decorative purposes.
This guide has covered “how to install wall moulding,” “how to cut wall moulding,” and “how to apply plaster cornice moulding,” along with material comparisons, installation tips, maintenance and painting advice, common mistakes, and FAQs — giving you a complete roadmap for a flawless finish.
Whether you aim for modern shaker/picture-frame styles or classic plaster cornice transitions, you now have a practical, professional plan. With proper planning and patience, decorative moulding can add lasting value to your living spaces.
